Stock Movements
This guide covers the day-to-day documents that actually move stock in and out of your warehouses — Adjustments, Transfers, Internal Transfers, Issue, Receive, Return In, Return Out, and Write Off.
A few closely related Inventory workflows already have their own manuals and aren't repeated here: Loading Requests (loading a Trip's vehicle — see the Loading Requests guide) and Transfer Requests (the planning step before a Transfer — see the Transfer Request guide), Issue Requests (the planning step before an Issue — see the Issue Request guide), and Bill of Materials & Manufacturing Orders (see the Manufacturing Order guide). This guide covers the execution side: the documents that actually move stock once a request has been approved, plus the movement types that don't need a request at all.
1. What is a stock movement?
A stock movement is any document that records stock actually changing — arriving, leaving, or moving between locations. Every movement you complete updates your warehouse's stock levels immediately.
| Movement | Direction | Typical use |
|---|---|---|
| Adjustments | Corrects a quantity, up or down | Entering opening stock, or correcting a count discrepancy |
| Transfers | Out of one warehouse, into another | Restocking a branch from the main store |
| Internal Transfers | Between units in the same warehouse | Moving stock from a receiving bay to a shelf |
| Issue | Out, to a customer | Recording stock that has left for a customer |
| Receive | In, from a supplier | Recording stock arriving from a supplier |
| Return In | In, from a customer | A customer sends stock back |
| Return Out | Out, to a supplier | Sending stock back to a supplier |
| Write Off | Out, permanently | Damaged, expired, lost, or otherwise unsellable stock |
Transfers and Issues are often created for you when a Transfer Request or Issue Request is fulfilled — see those guides for that flow. This part covers creating and managing these documents directly, which is also fully supported.
2. The common workflow
All eight document types on this page move through the same status lifecycle and offer the same actions at each stage. This section covers that shared pattern once — the sections that follow only cover what's specific to each document type.
Creating a document
- Go to the relevant item under Inventory in the sidebar (e.g. Inventory → Adjustments) and click Create.
- Fill in the header. The exact fields vary by document type (see Sections 3–10 below), but every one of them locks the Warehouse field to the warehouse you're currently checked into — you can't pick a different one. A Document manager field is available on every type and is always optional.
- Once created, the document opens on its detail page as a DRAFT, ready for you to add line items.
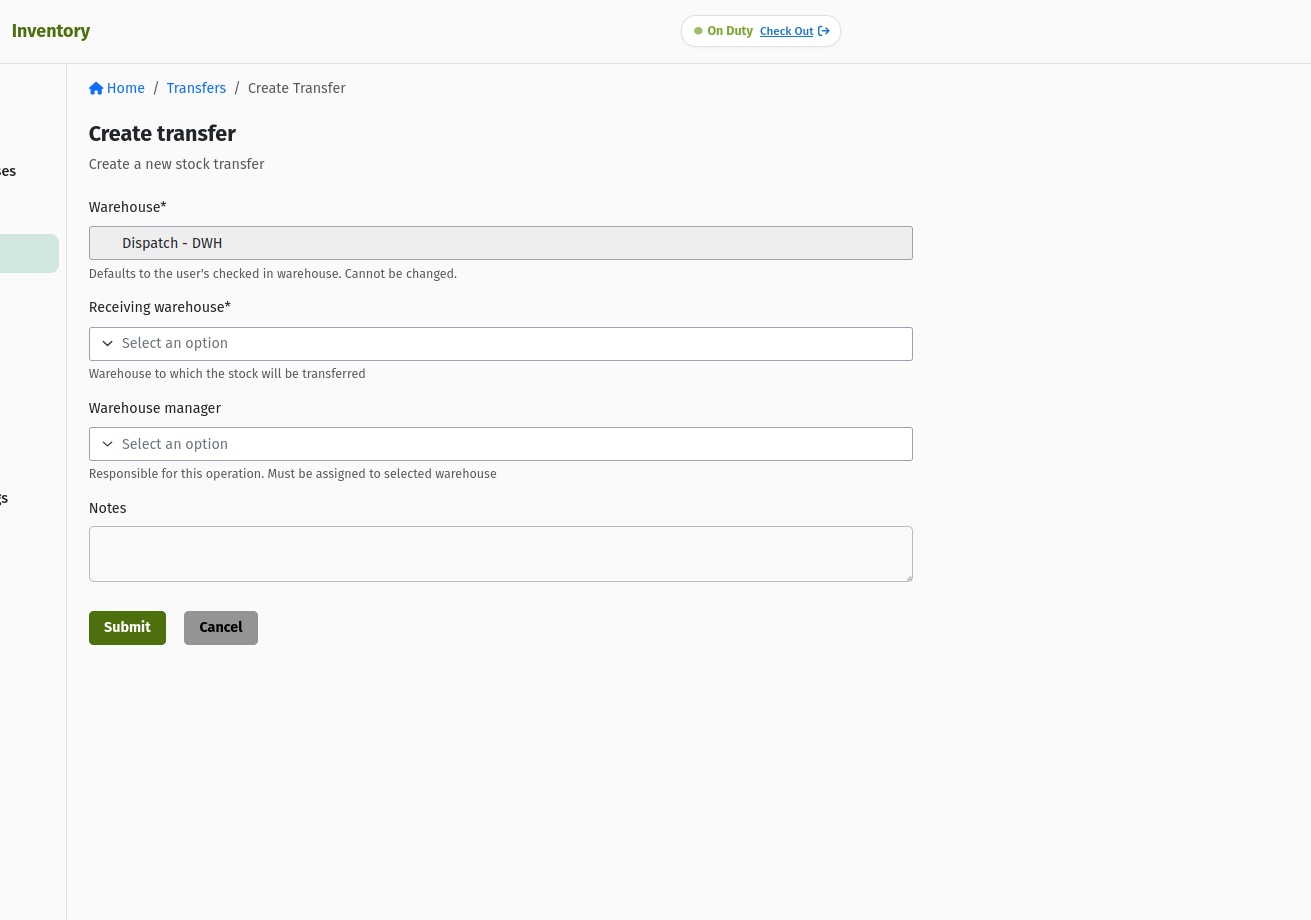 A typical "Create" form for a stock movement — the shape shared by all eight document types.
Adding line items
- On the detail page, click Add line.
- Fill in the line panel — always at least a Product, a Warehouse unit, and a Quantity, plus type-specific fields covered in Sections 3–10.
- Click Add line to save it, and repeat for every product.
Adding the same product twice to the same warehouse unit on one document is blocked — you'll see: "<product> already exists in <warehouse unit>. Update the existing entry or choose another product." Edit the existing line instead.
Submitting and approving
Once at least one line exists, the document can move through approval:
| You are here | You click | It becomes |
|---|---|---|
| DRAFT | Submit | READY |
| READY | Approve | APPROVED |
| READY | Return | RETURNED |
| READY | Reject | REJECTED |
| RETURNED | Resubmit | READY |
| APPROVED / IN_PROGRESS | Complete | COMPLETE |
| DRAFT / REJECTED / CANCELLED / COMPLETE | Archive | ARCHIVED |
No screenshot is currently available for the action buttons shown on a movement's detail page (movement-02-status-actions.png in the source training material has not been captured yet).
Many of these status changes — Return, Reject, and Resubmit among them — open a small confirmation form asking you to add notes explaining the reason for the action.
There's no Cancel button on these screens for everyday users. If a document needs to be called off, speak to your supervisor or administrator.
Approve, Return, Reject, and Complete are only shown to staff who hold the matching permission. Whether Approve requires one sign-off or several depends on how your organisation has configured sign-off rules for that document type — see Products & Inventory Settings.
Editing at each stage
What you can change depends on the document's current status:
| Status | What's editable |
|---|---|
| DRAFT | Fully editable. The Edit button lets you change header fields, and lines can be added, edited, or removed freely. |
| READY / APPROVED / IN_PROGRESS | Locked. No Edit button and no Add-line option — the document is awaiting or undergoing processing. |
| RETURNED | Line items can still be added, edited, or removed — the Add-line control reappears here. The header stays locked (no Edit button). Once you've made the necessary corrections, use Resubmit to send it back to Ready. |
| COMPLETE / REJECTED / CANCELLED / ARCHIVED | No edit controls. Archive is the only remaining action where applicable. |
A RETURNED document is not a dead end — it's meant to be corrected and sent back through. The header (warehouse, partner, reason, document manager) stays as it was set, but you're free to fix the line items before resubmitting.
What happens to inventory
Completing a movement is what actually changes your stock levels — drafting, submitting, and approving a document don't move any stock by themselves. The system also checks that the warehouse isn't locked (for example, by an active Stock Take — see Stock Take) and that there's enough stock for any movement that decreases a balance, before it can be approved or completed.
3. Adjustments
An Adjustment corrects a product's quantity in a warehouse unit, up or down, to match what's actually there. There are two ways one gets created.
Manual opening-stock adjustments
- Go to Inventory → Adjustments and click Create.
- Fill in the header:
- Warehouse — locked to your checked-in warehouse.
- Counted at — the date and time the count was taken.
- Document manager — optional.
- Notes — optional.
- Add a line per product:
- Warehouse unit — required.
- Product — required.
- Quantity before — set by the system; it's what's currently on record.
- Quantity — the amount you actually counted. Required.
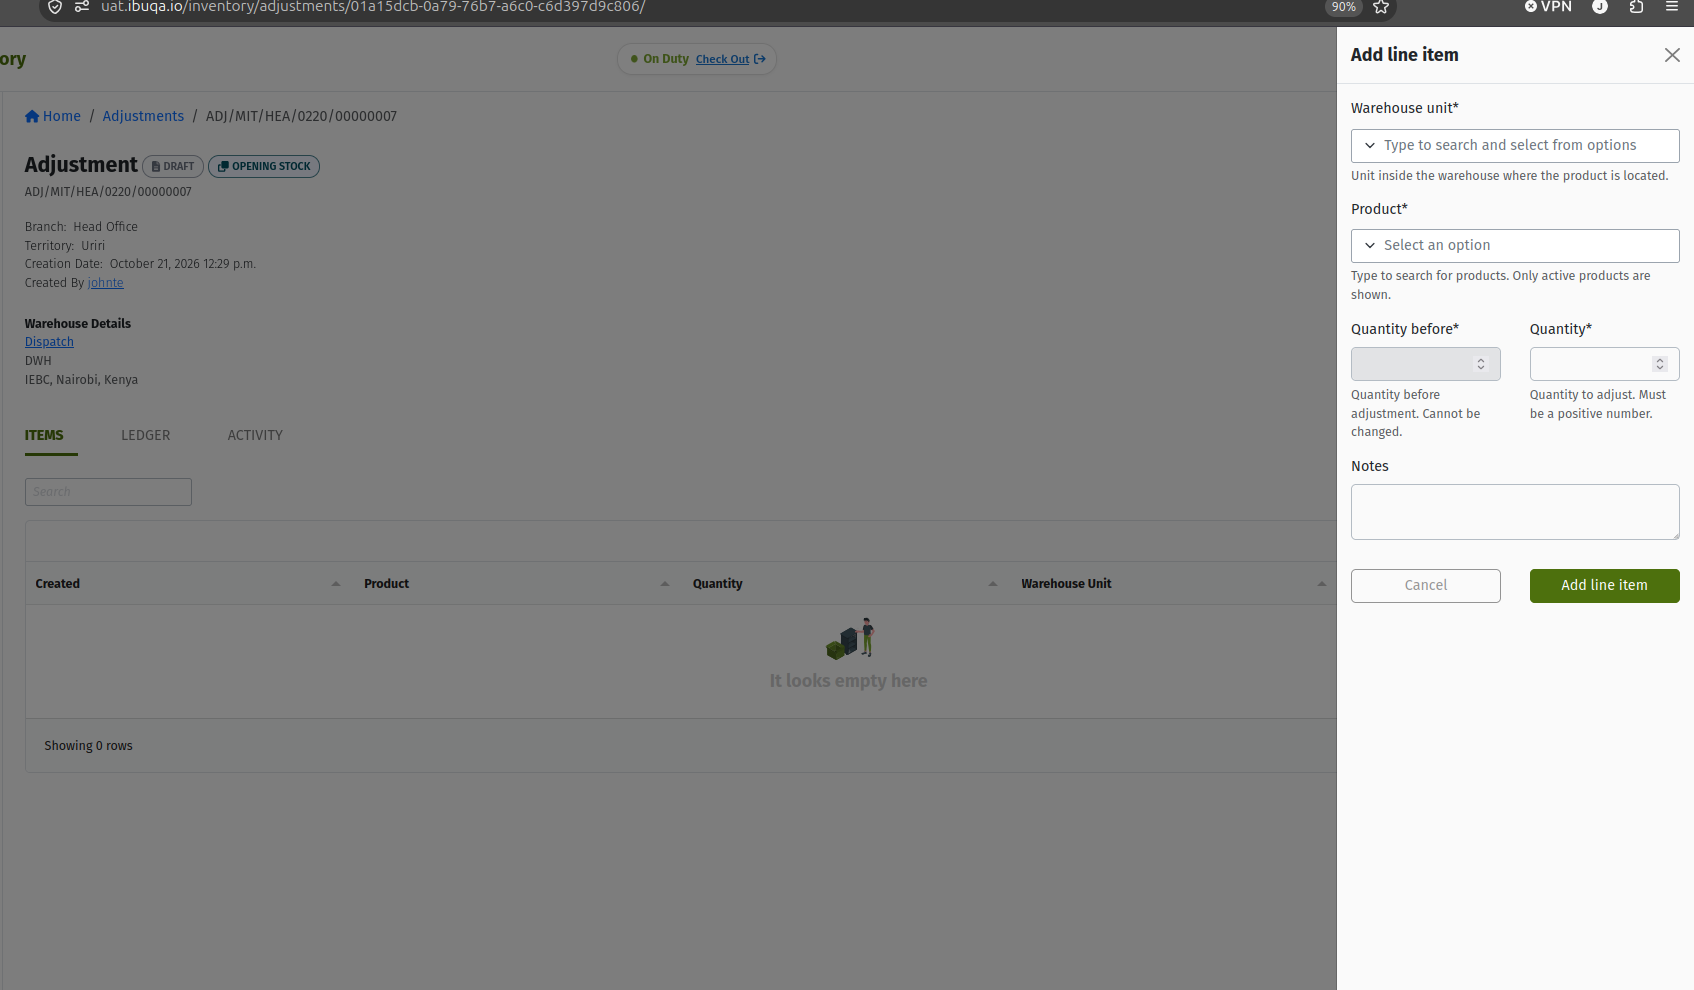 The "Add line" panel for an Adjustment, showing Quantity before and Quantity.
This path is intended for entering opening stock — the reason recorded on the document is set automatically and isn't a field you fill in yourself.
Adjustments generated by a Stock Take
You won't usually need to create an Adjustment for a routine count discrepancy — a Stock Take does this for you. Once approved, any leftover variance not otherwise accounted for is written to an Adjustment automatically, which is posted immediately without a separate manual approval step. See What a Stock Take generates for the full picture.
4. Transfers
Moves stock from your warehouse to a different warehouse.
- Go to Inventory → Transfers and click Create.
- Fill in the header:
- Warehouse — locked; this is the source.
- Receiving warehouse — search and select the destination. Required.
- Document manager — optional.
- Notes — optional.
- Add a line per product:
- Product — required.
- Quantity — required, greater than zero.
- Source warehouse unit — required.
- Receiving warehouse unit — required; only units in the receiving warehouse can be picked.
- Notes — optional.
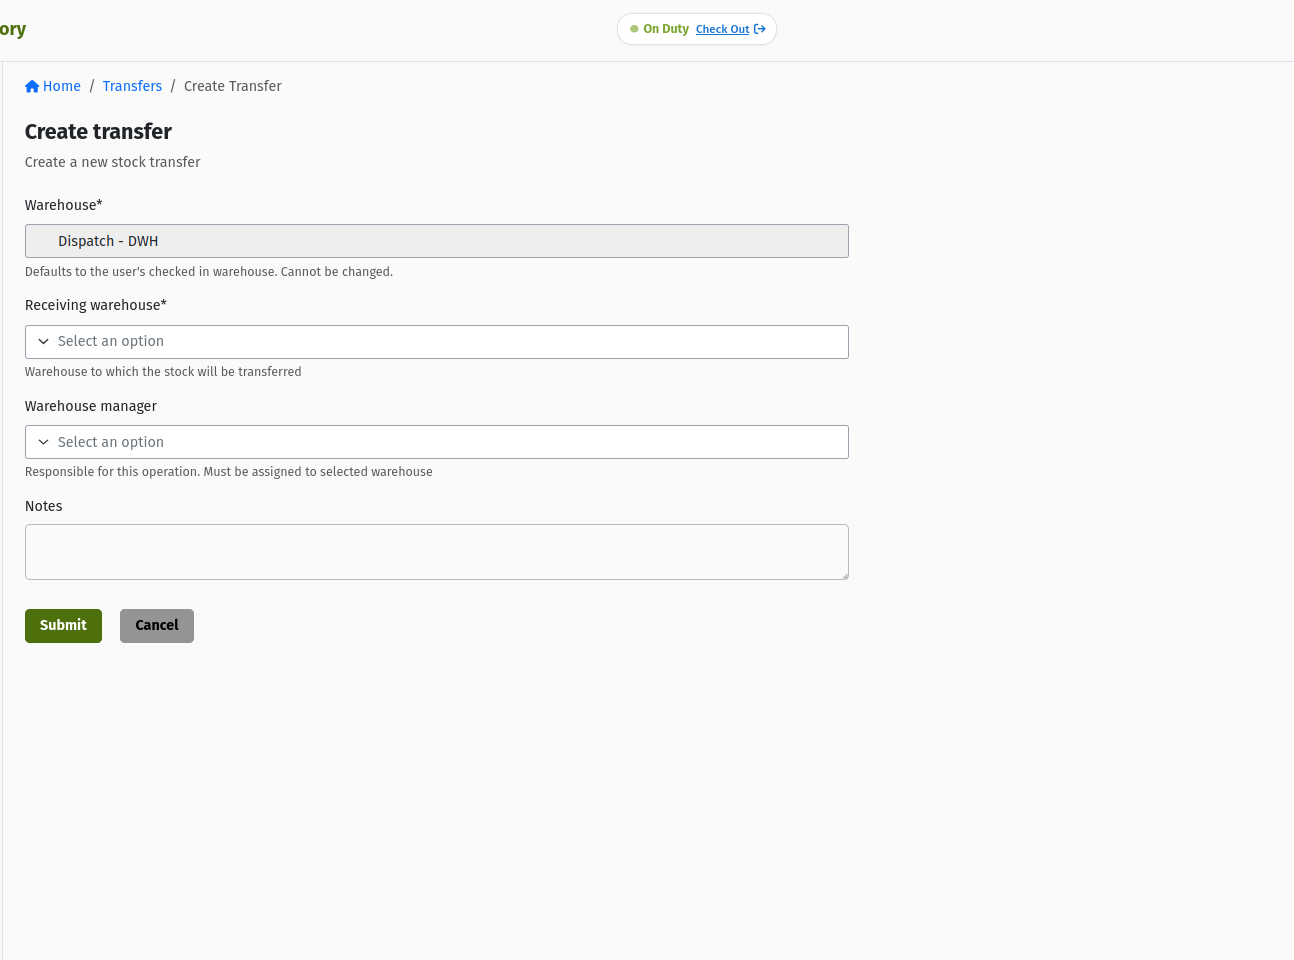 The Transfer create form, showing the source and receiving warehouse fields.
A receiving warehouse can be an ordinary warehouse, or a Transit Warehouse — a mobile warehouse tied to a specific vehicle (the vehicle's own Vehicle Warehouse, holding whatever is on board). Transit Warehouses aren't created from this screen; one is created automatically for each vehicle when the vehicle is added (see the Vehicles guide), and you can view your checked-in one read-only under Inventory → Transit Warehouses.
Transfers are often created automatically when a Transfer Request is fulfilled — see the Transfer Request guide for that flow — or when a Loading Request line is fulfilled with Fulfill via Transfer, which creates a Transfer into the vehicle's warehouse (see the Loading Requests guide). Either way, the stock only moves when the Transfer is completed. This section covers creating and managing a Transfer directly.
5. Internal Transfers
Moves stock between two storage units within the same warehouse — for example, from a receiving bay to a shelf. There's no destination warehouse to pick, because it never leaves the building.
- Go to Inventory → Internal Transfers and click Create.
- Fill in the header:
- Warehouse — locked.
- Document manager — optional.
- Notes — optional.
- Add a line per product:
- Product — required.
- Quantity — required.
- Source warehouse unit — required.
- Receiving warehouse unit — required; both units are scoped to the same warehouse.
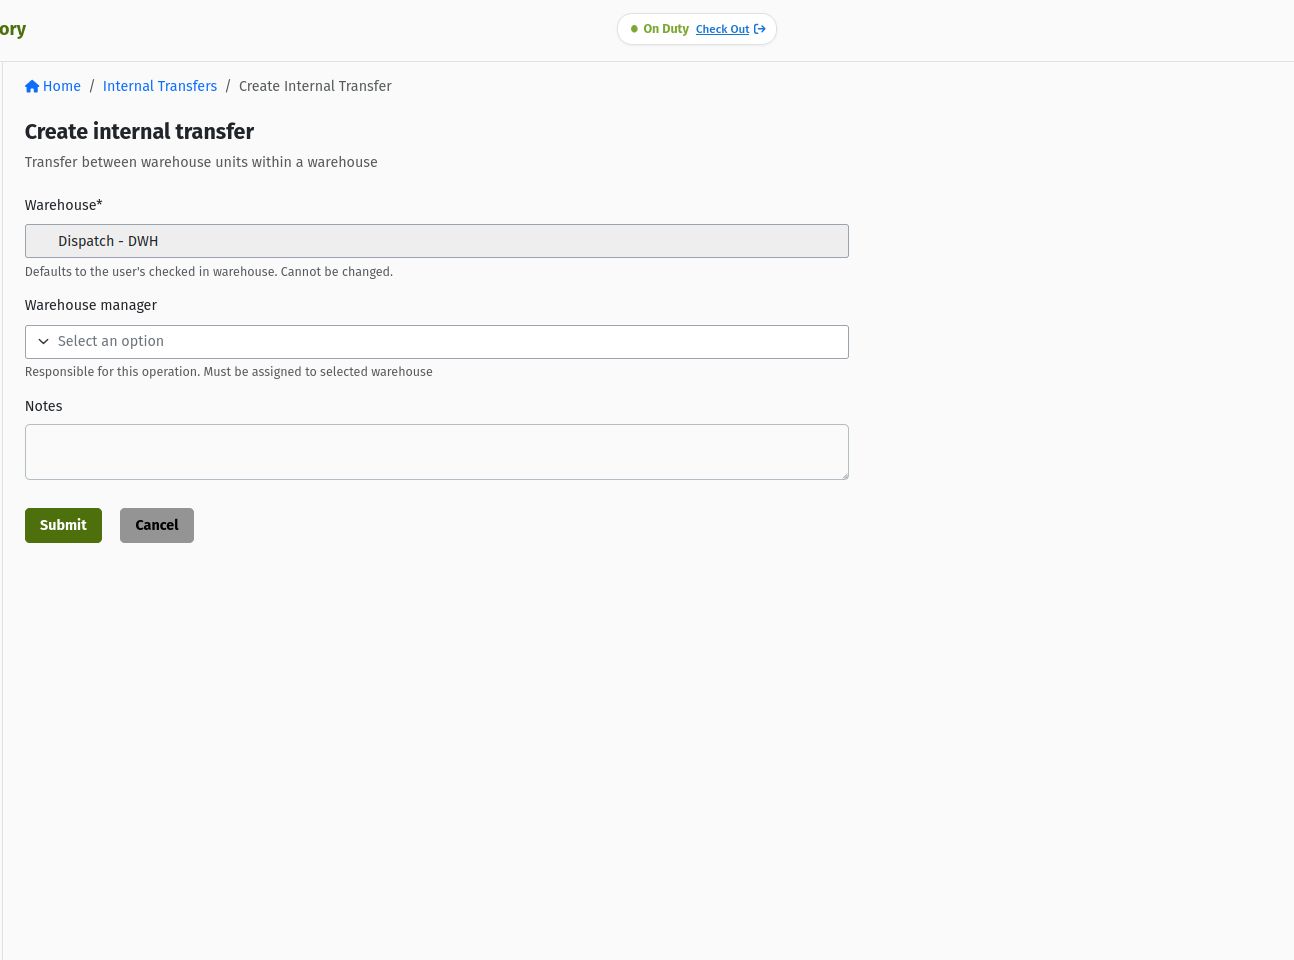 The "Add line" panel for an Internal Transfer — source and receiving units both within one warehouse.
The source and receiving warehouse unit on a line can't be the same unit — the form blocks it.
6. Issue
Records stock leaving your warehouse for a customer.
- Go to Inventory → Issue and click Create.
- Fill in the header:
- Warehouse — locked.
- Customer — required.
- Reason for issue — required.
- Document manager — optional.
- Notes — optional.
- Add a line per product:
- Warehouse unit — required.
- Product — required.
- Quantity — required, greater than zero.
- Notes — optional.
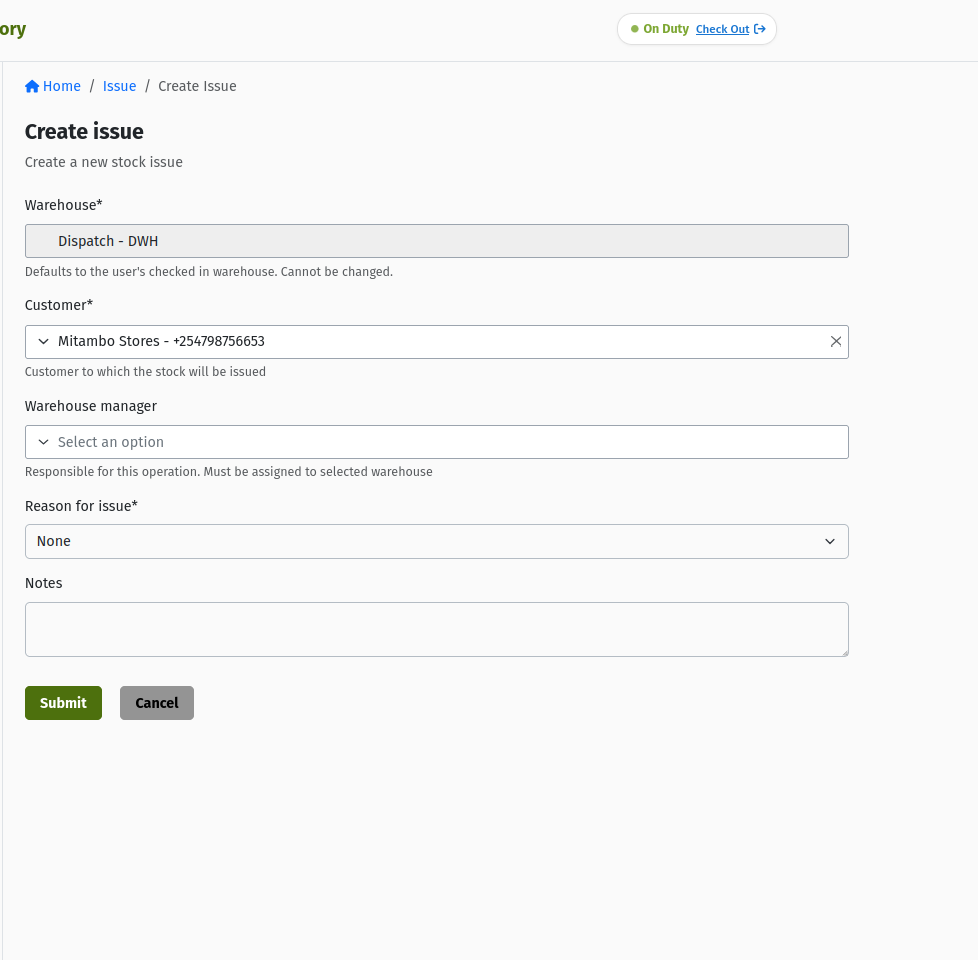 The Issue create form.
Issue documents are often created automatically when an Issue Request is fulfilled — see the Issue Request guide for that flow. This section covers creating and managing an Issue directly.
7. Receive
Records stock arriving into your warehouse from a supplier.
- Go to Inventory → Receive and click Create.
- Fill in the header:
- Receiving warehouse — locked.
- Supplier — required.
- Reason for receipt — required.
- Document manager — optional.
- Notes — optional.
- Add a line per product — the same Warehouse unit, Product, Quantity, and Notes fields as Issue.
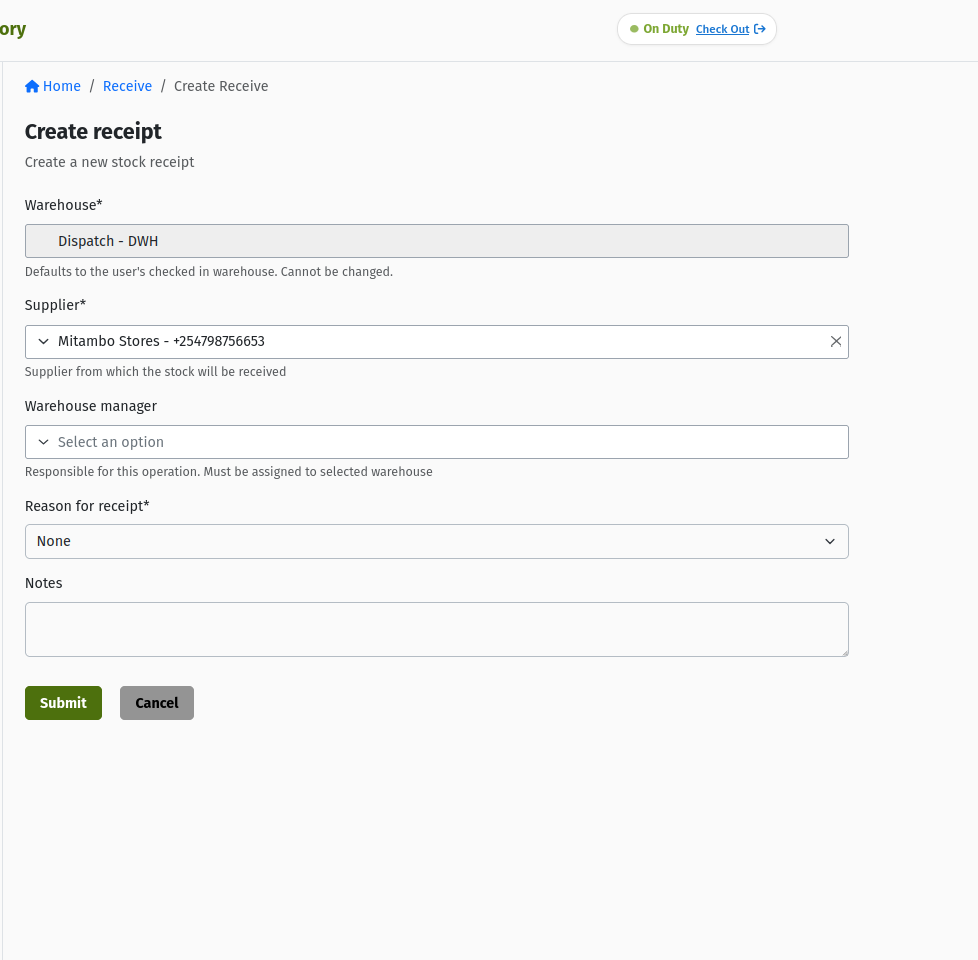 The Receive create form.
A Receive document can also be generated for you when an Issue Request includes collecting a returnable item back from a customer (for example, empty bottles or crates alongside an issue) — see the Issue Request guide.
8. Return In
Records stock a customer is sending back to your warehouse. It works the same way as Receive, just with the partner filtered to customers.
- Go to Inventory → Return In and click Create.
- Fill in the header:
- Warehouse — locked.
- Customer — required.
- Reason for return — required.
- Document manager — optional.
- Notes — optional.
- Add a line per product — Warehouse unit, Product, Quantity, Notes.
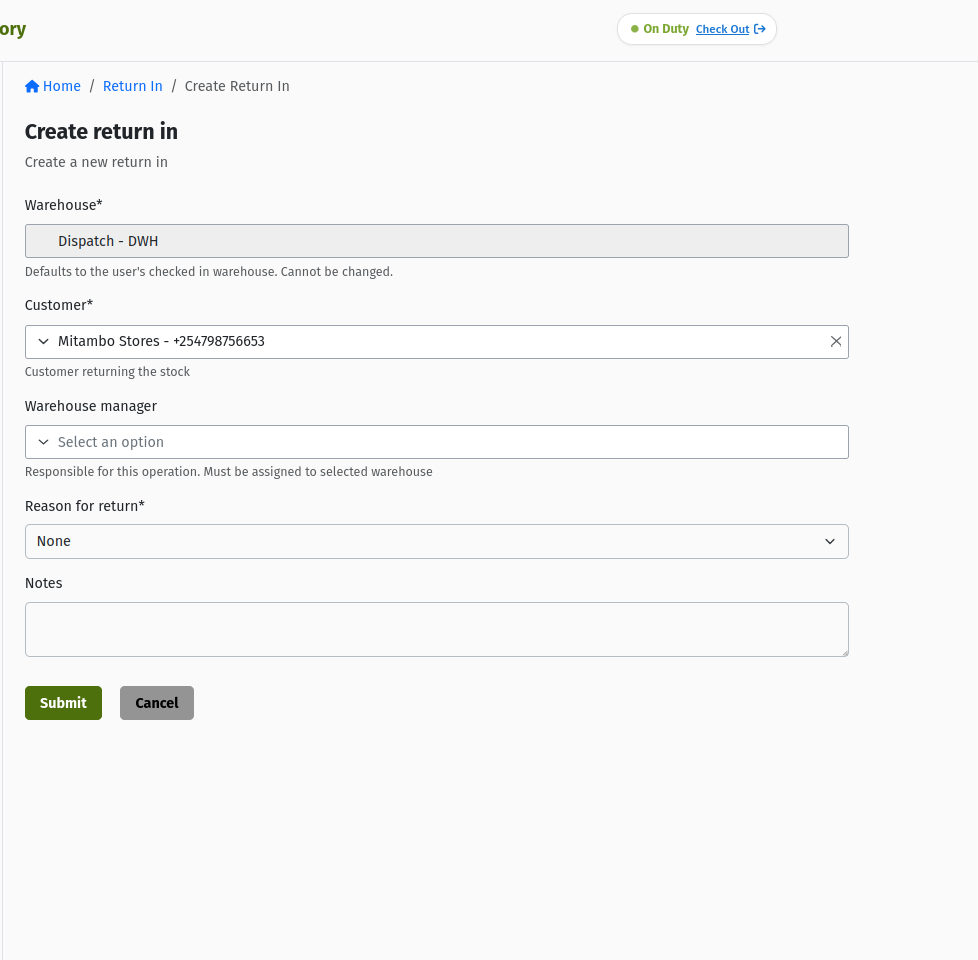 The Return In create form.
Remember: a Return In that gets sent to RETURNED status during approval isn't locked shut. As covered in Section 2, you can still correct its line items and resubmit it — that Returned status is a normal, recoverable step in the approval flow, not a dead end.
9. Return Out
Records stock you're sending back to a supplier. It works the same way as Issue, just with the partner filtered to suppliers.
- Go to Inventory → Return Out and click Create.
- Fill in the header:
- Warehouse — locked.
- Supplier — required.
- Reason for return — required.
- Document manager — optional.
- Notes — optional.
- Add a line per product — Warehouse unit, Product, Quantity, Notes.
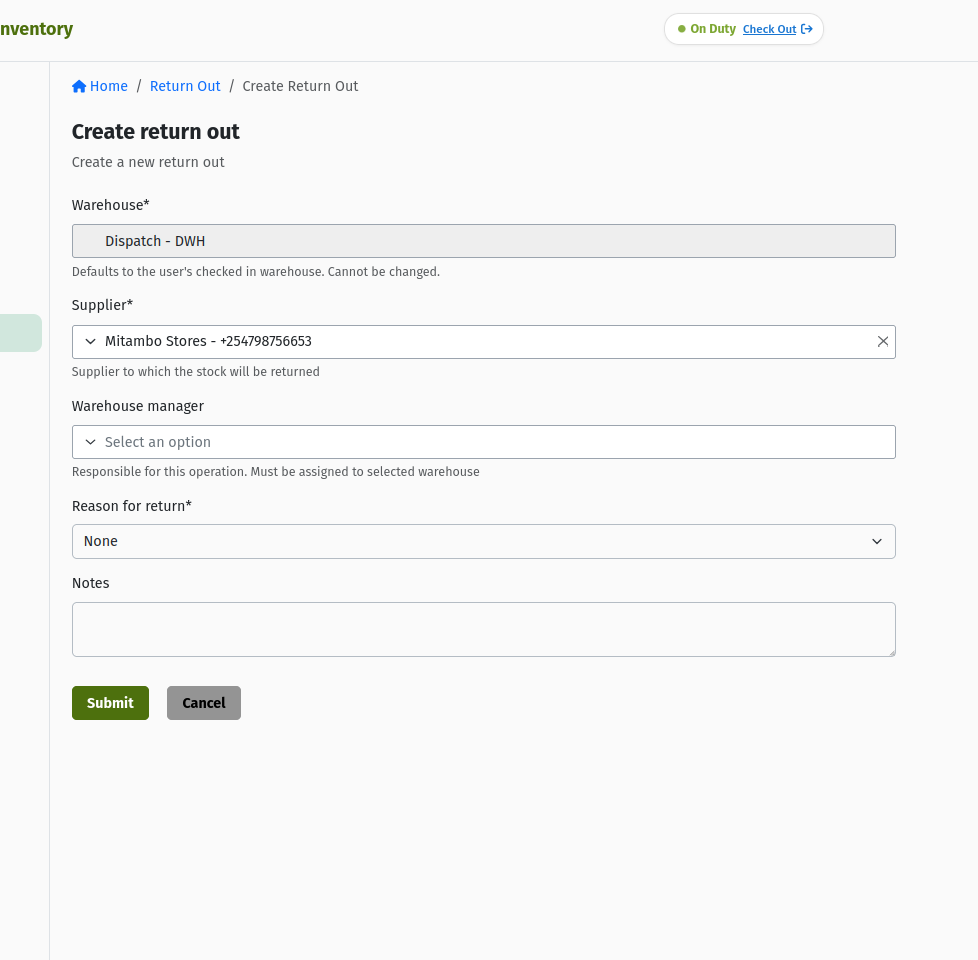 The Return Out create form.
A Stock Take can also generate a Return Out for you — one per supplier — when a count discrepancy is dispositioned to go back to a vendor. See What a Stock Take generates.
10. Write Off
Removes stock permanently — damaged, expired, lost, stolen, or otherwise unsellable.
- Go to Inventory → Write Offs and click Create.
- Fill in the header:
- Warehouse — locked.
- Reason for write off — a default reason for the document.
- Document manager — optional.
- Add a line per product:
- Warehouse unit — required.
- Product — required.
- Quantity — required, positive.
- Reason — the reason for writing off this specific line; can differ from the document's default.
- Notes — optional.
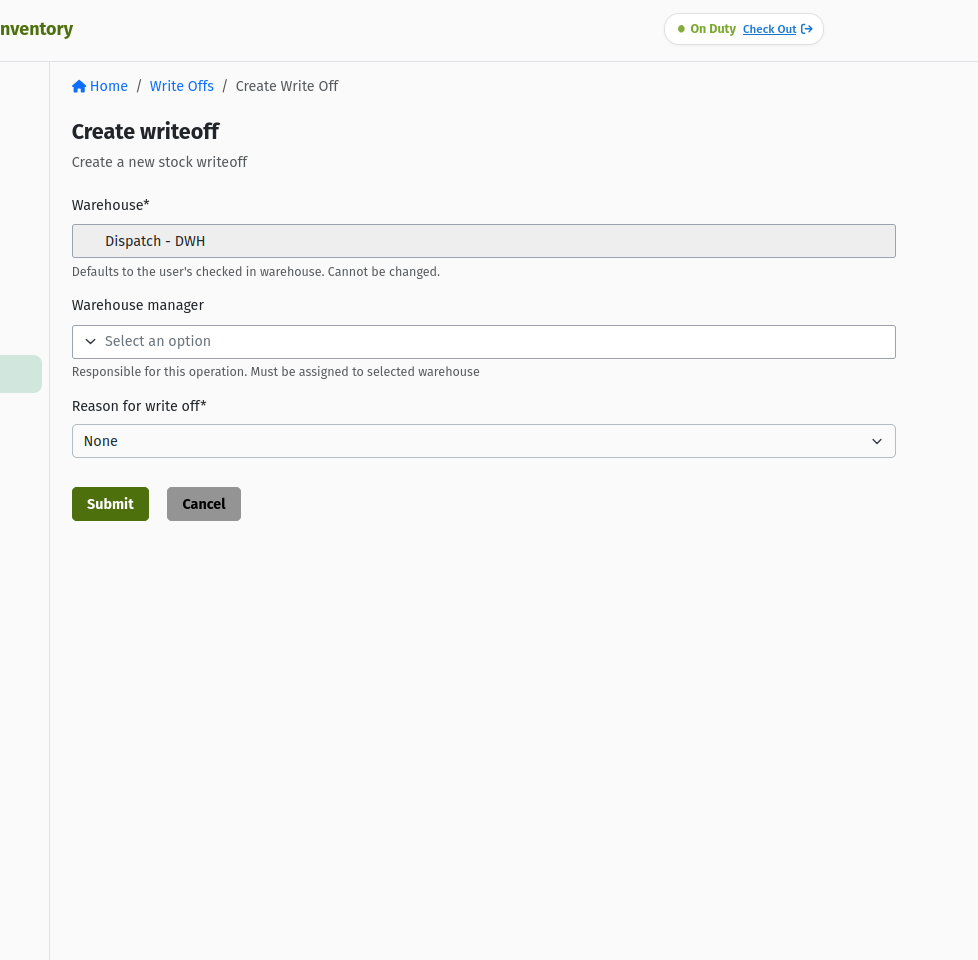 The Write Off create form and line panel, showing the per-line Reason field.
Unlike the other movement types, Write Off has no header-level Notes field — only the per-line Notes field is available.
There's no batch, lot, or expiry-date tracking in the system — write-offs are recorded at product-and-warehouse-unit level only. If you need to identify a specific batch or expiry date, record it in the line's Notes.
A Stock Take can also generate a Write Off for you automatically when a count discrepancy is dispositioned to be written off. See What a Stock Take generates.
11. Quick reference
Status meanings
| Status | What it means |
|---|---|
| DRAFT | Being built. Header and lines are fully editable. |
| READY | Submitted, waiting for approval. |
| APPROVED | Signed off, waiting to be completed. |
| IN_PROGRESS | Being processed on the way to Complete. |
| RETURNED | Sent back for correction. Line items stay editable; resubmit when ready. |
| REJECTED | Declined during approval. |
| CANCELLED | Called off. |
| COMPLETE | Finished — stock has been updated. |
| ARCHIVED | Closed out. Terminal. |
Glossary
- Header — the document-level fields — warehouse, partner, reason, document manager, notes — as opposed to its line items.
- Line item — a single product-and-quantity entry on a movement document.
- Warehouse unit — a specific storage location or bin within a warehouse.
- Document manager — an optional field naming the person responsible for the document.
- Transit Warehouse — a mobile warehouse tied to a specific vehicle — created automatically for each vehicle, not created from the Transfer screen.
12. Frequently asked questions
Can I still edit a document once it's been Returned?
Yes. The header stays locked, but you can still add, edit, or remove line items while a document is Returned — it's designed to be corrected and resubmitted, not treated as read-only.
What's the difference between a Transfer and an Internal Transfer?
A Transfer moves stock between two different warehouses. An Internal Transfer moves stock between two storage units inside the same warehouse — there's no destination warehouse to choose.
Why is there no Cancel button?
Cancelling is possible in the system, but there's no Cancel button on these screens for everyday users. If a document needs to be called off, speak to your supervisor or administrator.
Can I track a specific batch or expiry date when writing stock off?
No — the system doesn't track batches, lots, or expiry dates. Write-offs (and every other movement) are recorded at product-and-warehouse-unit level. Use the line's Notes field if you need to record that detail for your own reference.
Do I need someone else to approve my document?
That depends on how your organisation has configured sign-off rules for that document type — see Products & Inventory Settings.