Customers & Locations
This guide walks you through setting up a Customer and its Customer Locations — the two records every delivery in TradeStack depends on. You'll learn how to create a customer, take it through approval, add the delivery points that belong to it, and activate those points so they can be placed on a Route and chosen on a Delivery Order.
Customers and locations are the very first step of the delivery process. If you're new to Logistics, read the Trip Lifecycle overview first — it shows where this page fits in the full journey from order to reconciled trip.
1. What is a Customer?
A Customer is the business or person you sell to and deliver to. In TradeStack a customer is a Business Partner that has been flagged as a customer. The same Business Partner record can also be a supplier, but on this page we only deal with the customer side.
Every customer is one of two types:
| Type | Use it for | What's different |
|---|---|---|
| Individual | A single person — a sole trader, a home-delivery client, a market vendor | The category is set to Individual for you; you don't pick one |
| Corporate | A registered business — a supermarket chain, a hotel, a distributor | You choose a Business Partner Category, and the name must be unique among your corporate customers |
Where to find customers
Customers can be reached from two places in the console:
- Logistics → Customers
- Sales → Customers
These are the same records. A customer you create in Logistics appears in Sales and vice versa, so use whichever app you normally work in.
A customer on its own can't receive a delivery. Deliveries go to a Customer Location — a specific address that belongs to the customer (see Section 6). Think of the customer as who you deliver to and the location as where you deliver.
2. Before you start
| Requirement | Details |
|---|---|
| Logged-in branch and territory | All customer and location screens need you to be logged in to a branch and territory. |
| Permission to add customers | You need ADD_CUSTOMER to see the + Individual and + Corporate buttons. |
| Customer segments set up | Every customer must be given a Customer Segment. Segments are configured by your organisation; only active segments can be chosen. |
| Business partner categories | For corporate customers you'll choose a Business Partner Category from the list your organisation has configured. |
| A unique phone number | Each customer needs a primary phone number that isn't already used by another business partner in your organisation. The same applies to the email address if you enter one. |
| KYC documents (if required) | Your organisation may require certain documents to be uploaded before a customer can be approved. Have them ready (see Section 4). |
3. Creating a customer
Creating a customer is a two-step process: first the customer itself, then its first location. The console guides you straight from one to the other.
- Open Logistics → Customers (or Sales → Customers).
- Click + Individual or + Corporate, depending on the type of customer. On a phone-sized screen these sit under a New dropdown.
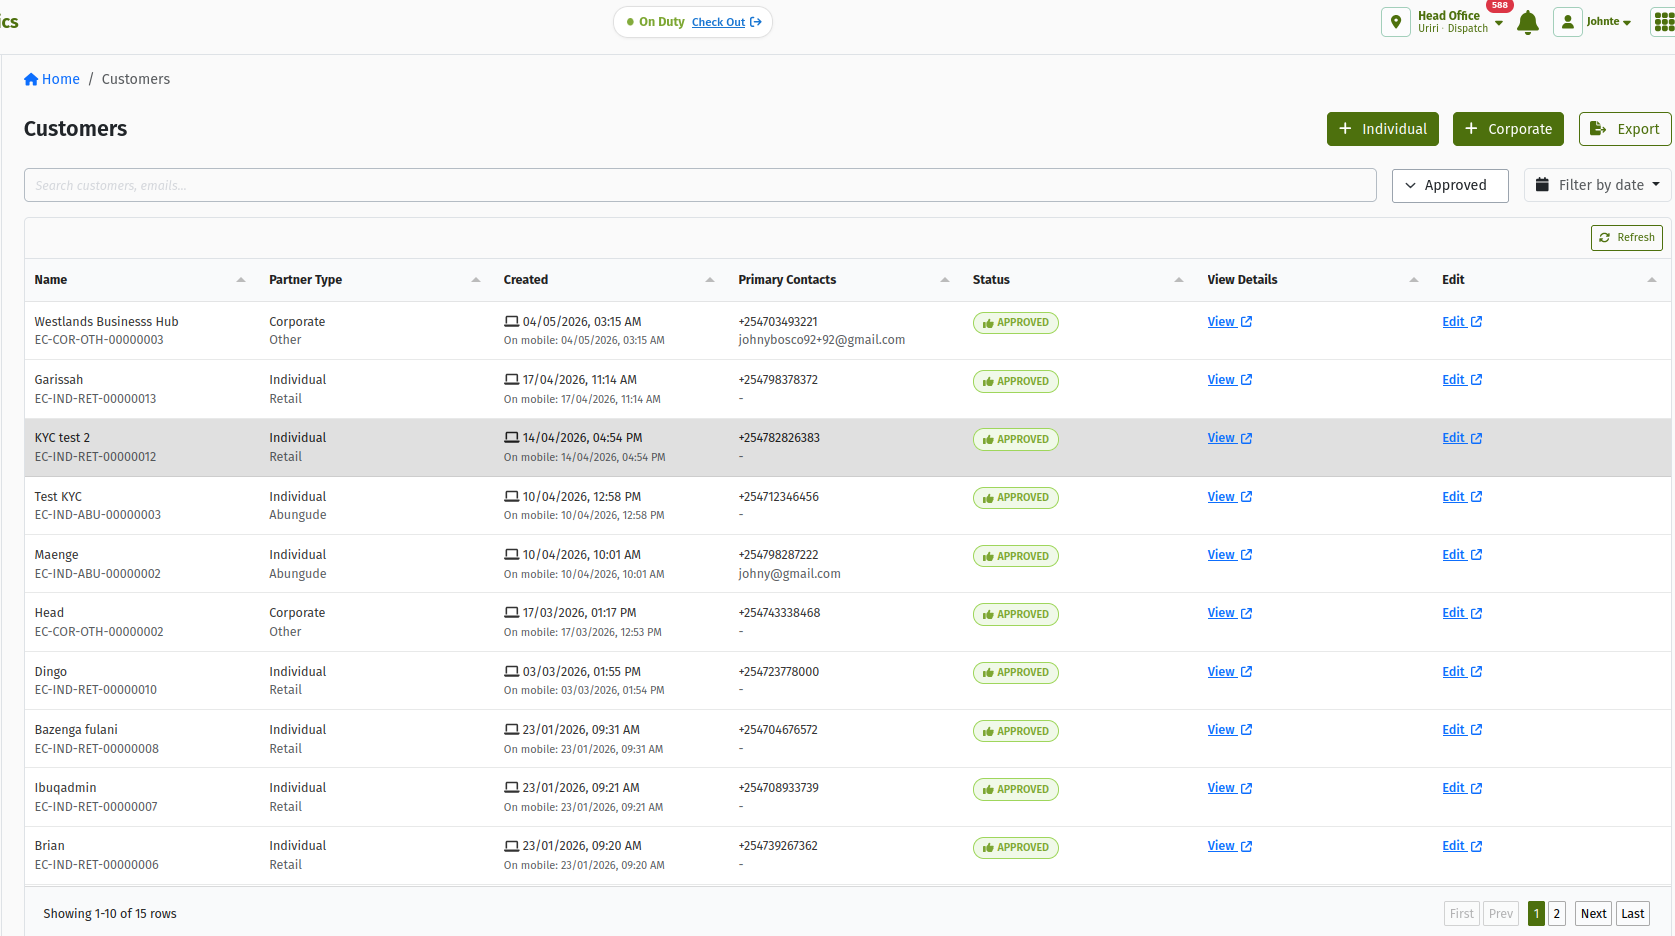 The "Customers" list, with the + Individual and + Corporate buttons, the search box "Search customers, emails...", and the status filter set to Approved.
- The Create Customer page opens. Note the info banner: "When setting up a new customer, you need to complete two steps: creating the customer and setting up their primary location."
- Fill in the fields:
| Field | Required? | Meaning and rules |
|---|---|---|
| Full Name | Yes | The customer's name as your team will recognise it. For corporate customers it must not already be used by another corporate customer in your organisation. |
| Phone Number | Yes | The primary phone, e.g. 0712345678 or +254712345678. Must not already belong to another business partner in your organisation. |
| Email Address | No | If entered, it must not already belong to another business partner in your organisation. |
| Customer Segment | Yes | The segment this customer belongs to (for example a trade channel). Drives reporting and, in some organisations, pricing. |
| Business Partner Category | Corporate only | The kind of business. Hidden for Individual customers, whose category is always Individual. |
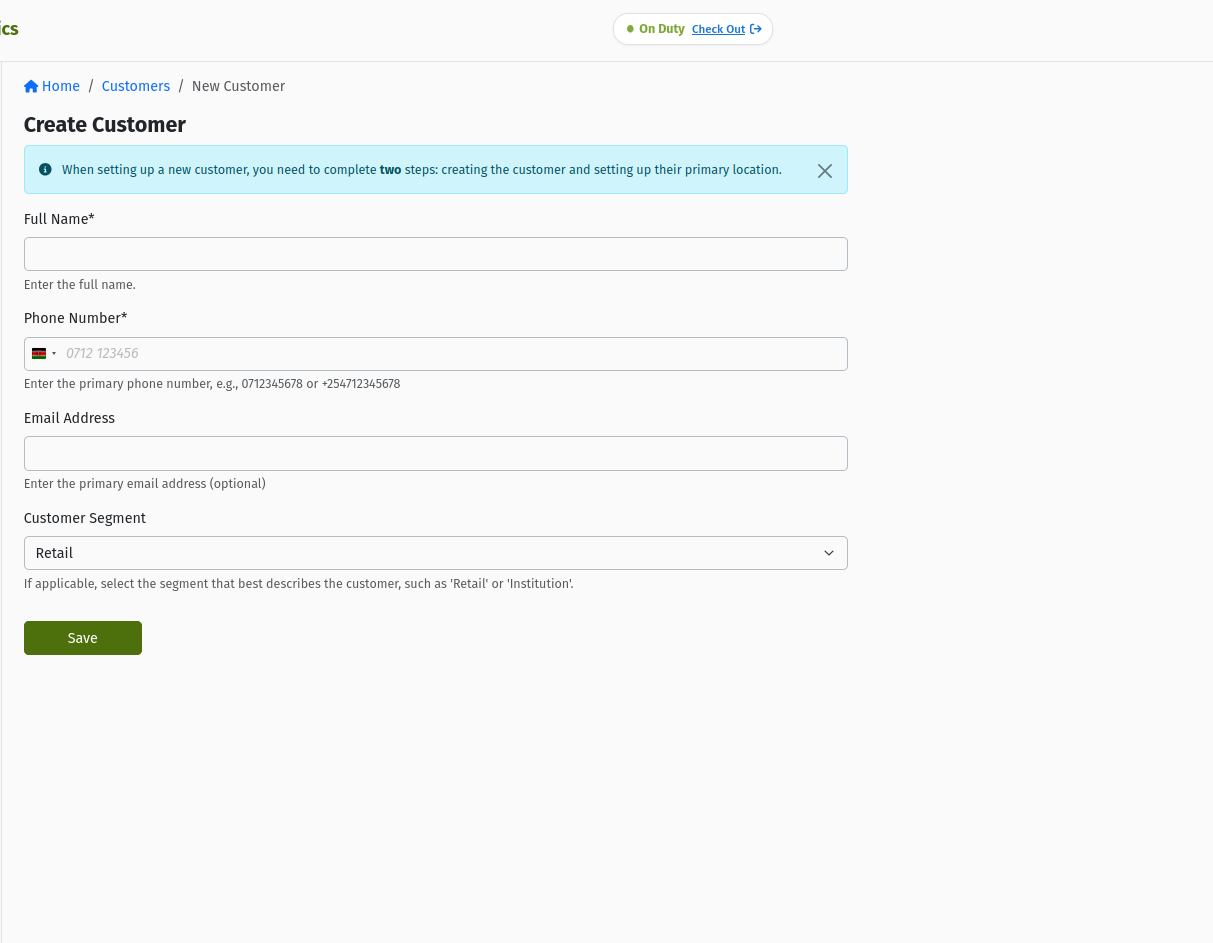 The "Create Customer" form for a corporate customer, showing the two-step info banner, the Customer Segment and Business Partner Category fields, and the Save button.
- Click Save. The customer is created as DRAFT and you're taken straight to the Create location page to add its first delivery point (see Section 7).
Every customer is given a reference number automatically when it's created — you don't type one.
If you see "The phone number … is already in use…" or "The email address … is already in use by another business partner.", the customer may already exist. Search the list (remember to change the status filter — see Section 5) before creating a second record for the same customer.
4. Customer statuses and approval
A new customer starts in Draft and can't be used for business until someone approves it. This gives your organisation a chance to check the details — and any required documents — before goods are sold or delivered.
Status meanings
| Status | What it means |
|---|---|
| DRAFT | Just created, or sent back for correction. Not yet usable on orders. |
| APPROVED | Checked and approved. Can be used on Sales Orders and Delivery Orders, and its active locations can be added to routes. |
| REJECTED | Turned down at approval. Can be redrafted for correction or archived. |
| SUSPENDED | Temporarily blocked (for example, an account on hold). Can be approved again. |
| DEACTIVATED | Permanently blocked from transactions. Can only be archived. |
| ARCHIVED | Removed from active business. Final — no further changes. |
Allowed transitions
DRAFT        → APPROVED, REJECTED
REJECTED     → DRAFT (Redraft), ARCHIVED
APPROVED     → SUSPENDED, DEACTIVATED
SUSPENDED    → APPROVED, DEACTIVATED
DEACTIVATED  → ARCHIVED
ARCHIVED     (final)
| You are here | You click | It becomes |
|---|---|---|
| DRAFT | Approve | APPROVED |
| DRAFT | … → Reject | REJECTED |
| REJECTED | … → Redraft | DRAFT |
| REJECTED | Archive | ARCHIVED |
| APPROVED | Suspend | SUSPENDED |
| APPROVED | … → Deactivate | DEACTIVATED |
| SUSPENDED | Approve | APPROVED |
| SUSPENDED | … → Deactivate | DEACTIVATED |
| DEACTIVATED | Archive | ARCHIVED |
The main action for the current status appears as a button at the top of the customer's detail page; the others sit in the … dropdown next to it. Edit is available in every status except Archived.
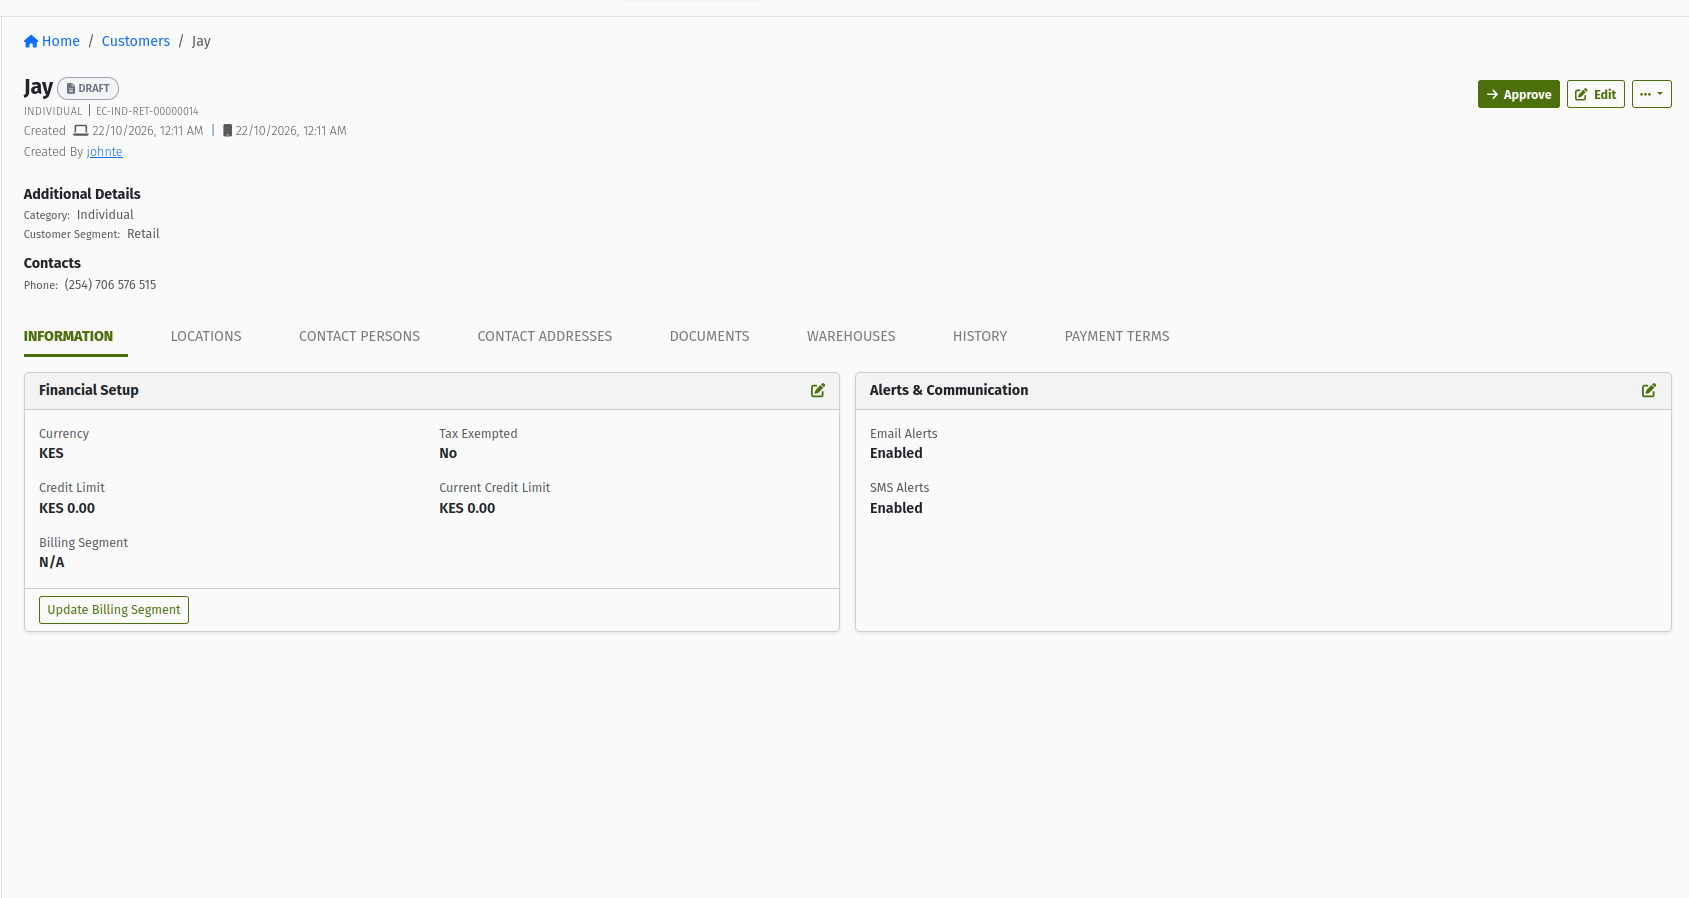 A Draft customer's detail page — the name with its DRAFT status chip, the Approve and Edit buttons, the … dropdown open showing Reject, and the tabs Information, Locations, Contact Persons, Contact Addresses, Documents and History.
Approving a customer
- Open the customer and click Approve.
- The Approve Business Partner page opens ("Approve partner to enable participation in transactions"). Add a note if you wish — it's optional for approval.
- Click Approve.
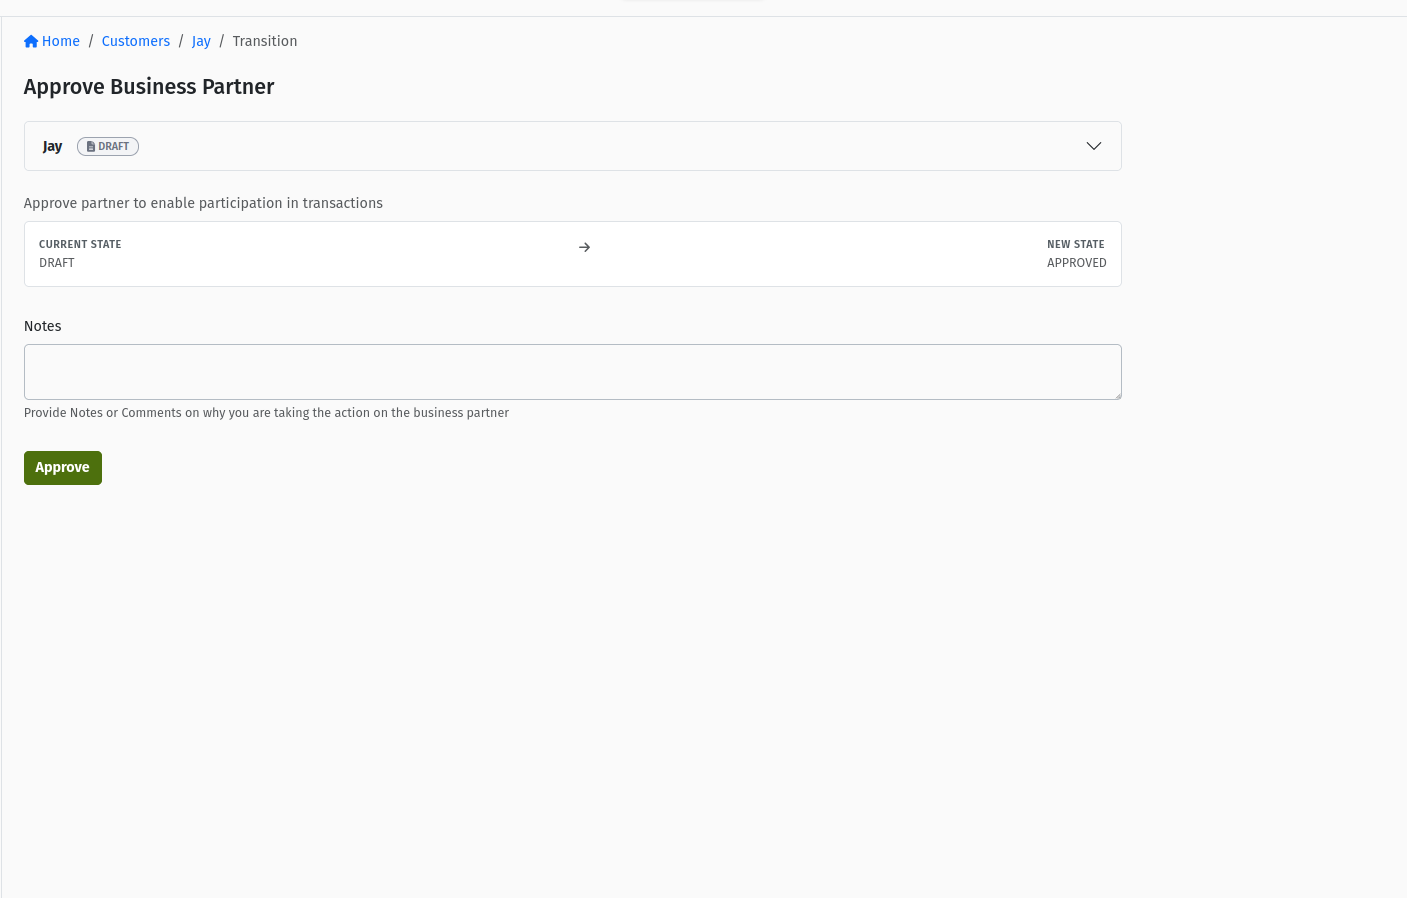 The "Approve Business Partner" page with its optional notes box and the Approve button.
Your organisation can require certain KYC documents to be uploaded before a customer is approved. If any are missing, approval is blocked with a message like "Sorry! Can not proceed with this action because some documents for … have not been uploaded, missing documents are: …". Upload the listed documents on the customer's Documents tab, then approve again.
Notes are required for blocking actions
When you Reject, Suspend or Deactivate a customer, you must enter a note explaining why. The note is saved to the customer's History tab, so the next person can see why the customer was blocked. Each action has its own confirmation page — Reject Business Partner, Suspend Business Partner, Deactivate Business Partner, Archive Business Partner and Mark Business Partner as Draft (used by Redraft).
What approval unlocks
Approving a customer is what makes it usable across the system:
- It can be selected as the Customer on a Sales Order — only approved business partners are offered.
- It can be selected as the recipient on a Delivery Order.
- Its Active locations become eligible to be added to a Route.
- In the background, the system also sets up the customer's accounts and related records.
What suspending or deactivating does
- Suspend temporarily blocks the customer from new transactions. Any recurring delivery schedules linked to the customer are paused, and they resume automatically when you approve the customer again.
- Deactivate blocks the customer permanently. Linked recurring delivery schedules are cancelled.
Use Suspend for a temporary hold (an overdue account, a dispute) and Deactivate only when you'll never trade with the customer again. Suspension is fully reversible; deactivation is not.
5. Finding new records: the default filters
Two lists hide brand-new records by default. This catches out almost every new user, so it's worth remembering:
| List | Default filter | What you won't see until you change it |
|---|---|---|
| Customers list | Status = Approved | Customers in Draft, Rejected, Suspended, Deactivated, Archived |
| A customer's Locations tab | Status = Active | Locations that are Pending Approval, Suspended, Inactive, Closed |
To find a customer you've just created, change the customers list's status filter to Draft. To find a location you've just added, change the Locations tab's filter to Pending Approval.
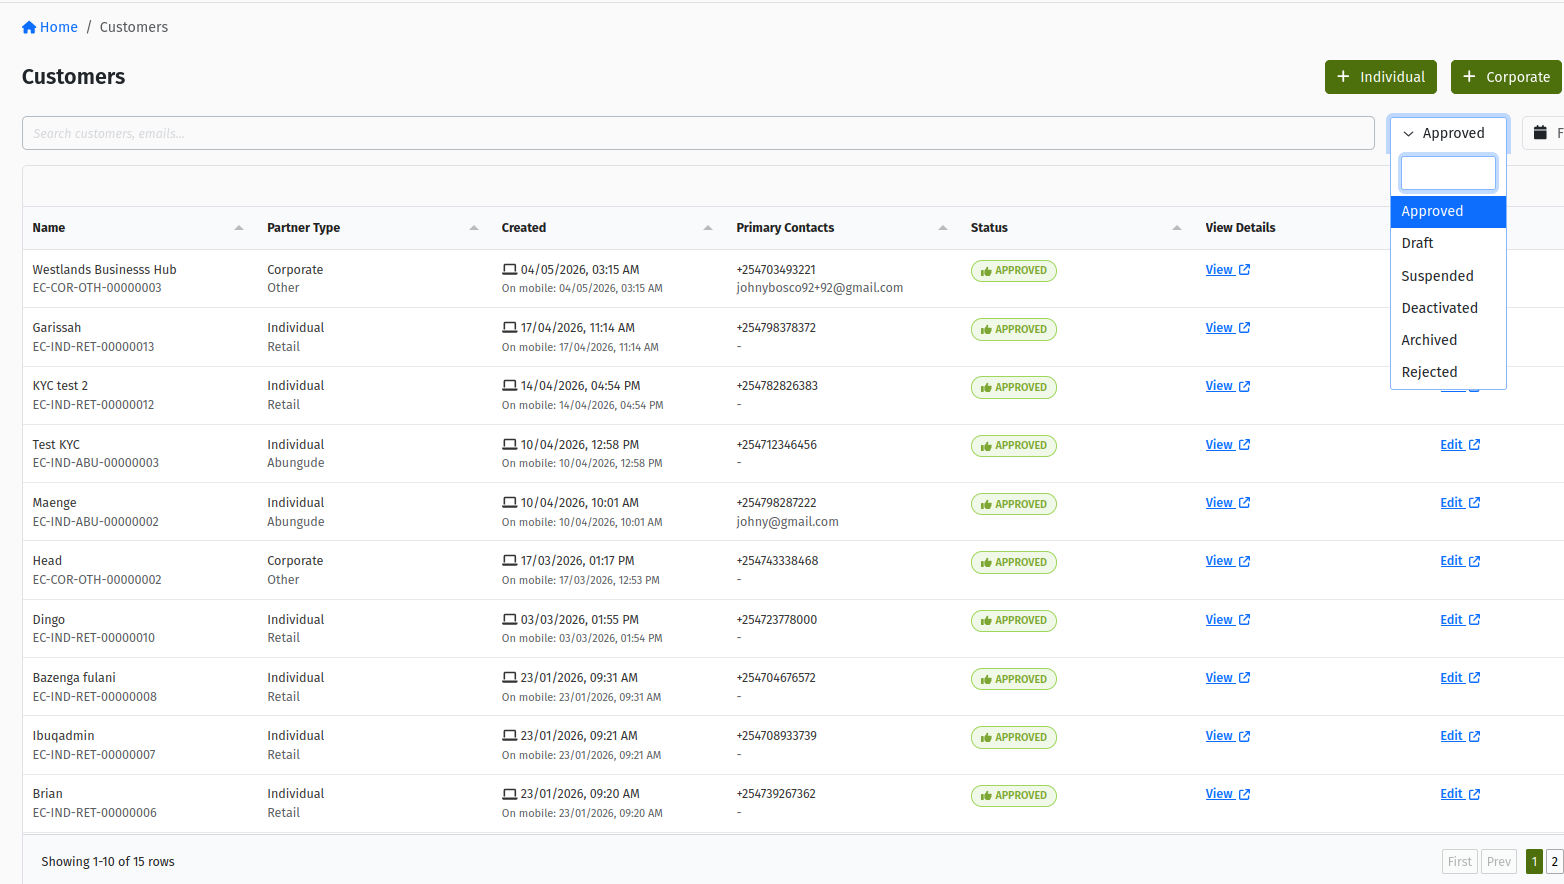 The status filter on the "Customers" list opened to show Approved, Draft, Suspended, Deactivated, Archived and Rejected.
6. What is a Customer Location?
A Customer Location is a specific delivery point that belongs to a customer — a shop, a branch, a warehouse dock, a site gate. It holds the address, the map point, delivery instructions and contact people for that place.
A customer and a location are not the same thing:
- One customer, many locations. A supermarket chain is one customer, but it may have a head office and a dozen branches. Each branch is a separate Customer Location under the same customer.
- Billing vs shipping. A location can be a Shipping location (where goods are delivered) or a Billing location (where invoices go, such as a head office that never receives stock).
- Deliveries target locations, not customers. When you create a Delivery Order you pick the customer and the exact location the goods are going to. Routes are also built from locations, not customers.
Customer: Mavuno Supermarkets (Corporate, Approved)
├── Head Office – Upper Hill        (Billing)
├── Mavuno Westlands                (Shipping)
├── Mavuno Thika Road               (Shipping)
└── Mavuno Kitengela                (Shipping)
Each location is given a code automatically when it's created.
7. Creating a Customer Location
You arrive at the Create location page automatically after saving a new customer. To add more locations later:
- Open the customer's detail page and select the Locations tab.
- Click + New.
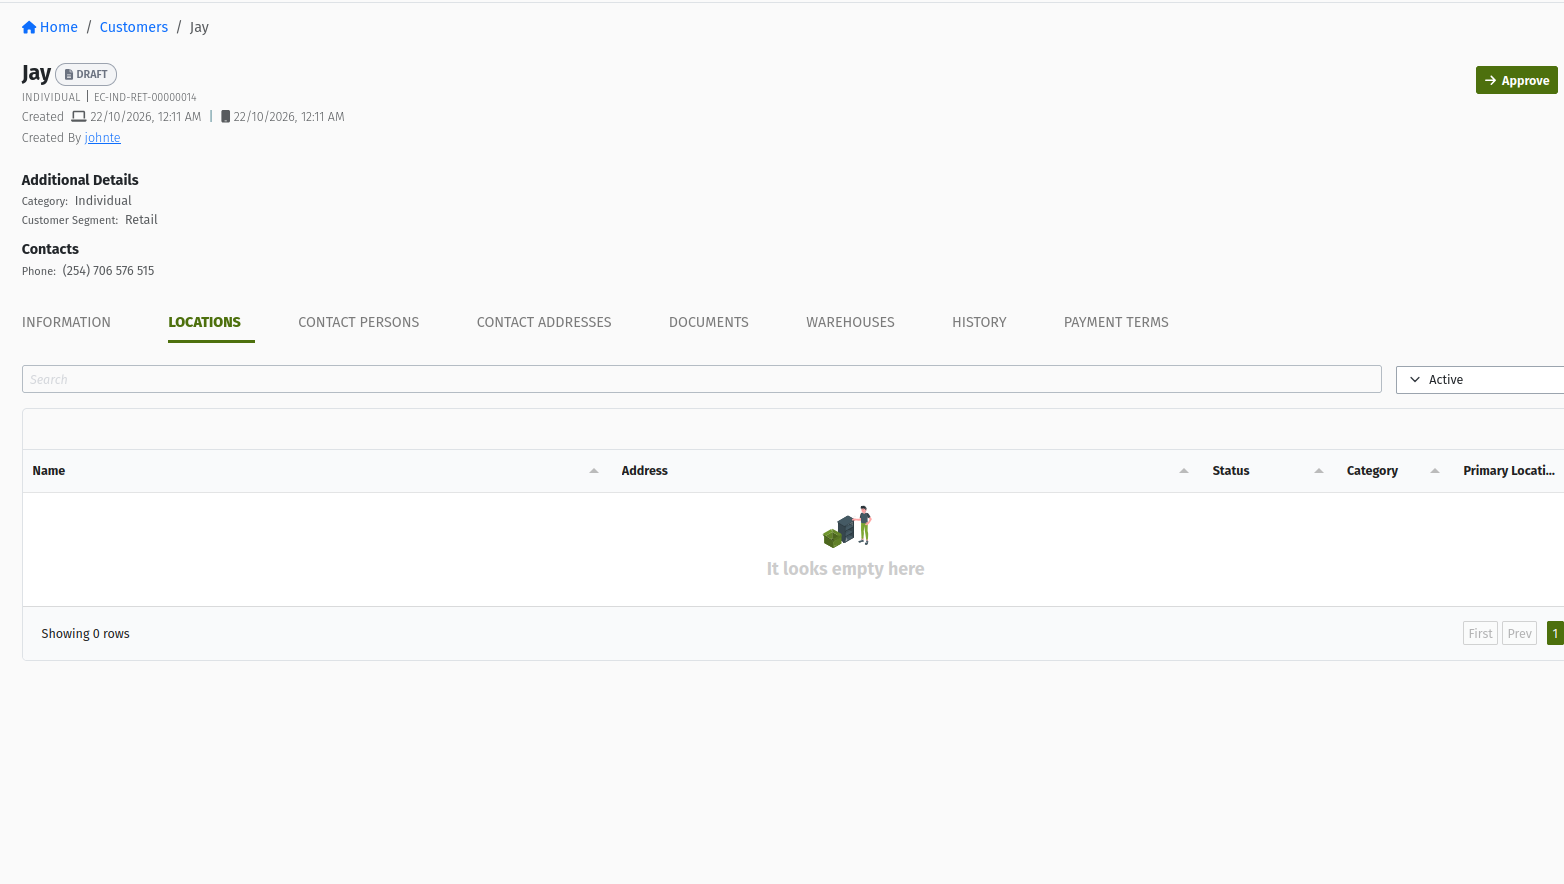 A customer's "Locations" tab with the + New button, the status filter (Active by default) and the columns Name, Address, Status, Category and Primary Location.
- Fill in the form:
| Field | Required? | Meaning and rules |
|---|---|---|
| Location Type | Yes | Shipping (default) for a delivery point, or Billing for an invoicing address. |
| Location name | Yes | The short name your drivers and dispatchers will recognise, e.g. "Dispatch bay", "Main gate", "Head office", or the branch name. |
| Location Address | Yes | Start typing and pick an address from the Google suggestions. Suggestions are limited to Kenya. Picking a suggestion is what records the map point — typing an address without selecting one is rejected. |
| Building Name | No | The building or plaza. |
| Department | No | A department or receiving section, if deliveries go to a specific one. |
| Additional Information | No | Any extra address detail. |
| Street | No | Street name. |
| Town/City | No | The town or area. |
| Landmark | No | A nearby landmark that helps a driver find the place. |
| Description or other details | No | Delivery instructions — receiving hours, where to park, who to ask for. |
| Location Photo | No | A photo of the frontage (JPG, JPEG or PNG). |
| External Reference | No | Your own or the customer's reference for the site. Only shown if your organisation has enabled it. |
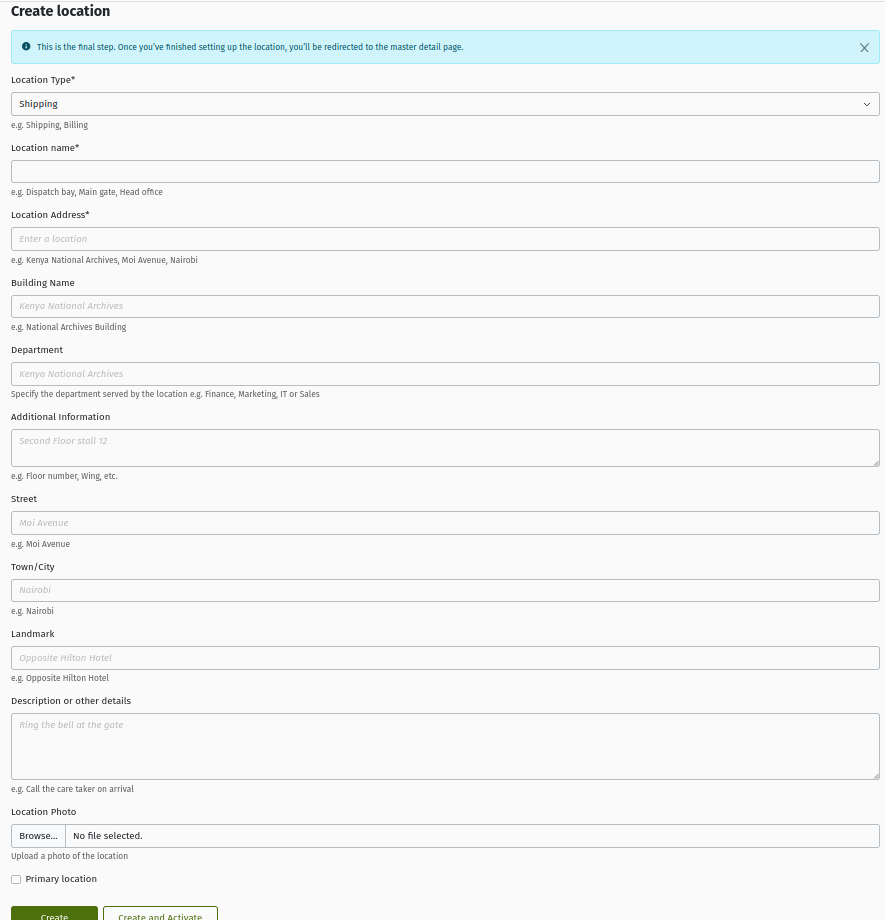 The "Create location" form with the Location Type, Location name and Location Address fields, a Kenya address suggestion dropdown open, and the Create and Create and Activate buttons.
- Save the location using one of the two buttons:
- Create — saves the location as PENDING_APPROVAL. Someone with approval rights must activate it later.
- Create and Activate — saves and activates it in one step, so it's ACTIVE straight away. This button only appears if you're allowed to activate locations.
You'll see "The business partner location was created." and return to the customer's detail page. When you create the first location for a new customer, the page shows "This is the final step…" — saving it completes the customer set-up.
If you see "Invalid latitude. Kindly type and select your location from the dropdown.", you typed an address but didn't click one of the suggestions. Type again and select a suggestion from the list.
Get the map point right. Drivers navigate to it, and the system uses it to work out the location's territory (see Section 9). If the address autocomplete doesn't know a small shop, pick the nearest recognisable place and use Landmark and Description or other details to guide the driver the last few metres.
8. Location statuses
Like customers, locations have their own approval lifecycle — separate from the customer's. A location has to be Active before it can be used.
Status meanings
| Status | What it means | Routes and Delivery Orders |
|---|---|---|
| PENDING_APPROVAL | Created but not yet activated. | Can't be added to a route or chosen on a Delivery Order. |
| ACTIVE | In use. | Can be added to routes and chosen on Delivery Orders — provided the customer is Approved. |
| SUSPENDED | Temporarily out of use (e.g. a branch closed for renovation). Linked recurring delivery schedules are paused. | Not offered for new routes or Delivery Orders until reactivated. |
| INACTIVE | No longer in use, but could come back. Linked recurring delivery schedules are cancelled. | Not offered for new routes or Delivery Orders. |
| CLOSED | Permanently closed. Final — no further changes. Linked recurring schedules are cancelled. | Never offered again. |
A location is only usable when both conditions hold: the location is Active and the customer is Approved. An Active location belonging to a Draft customer still won't appear when you build a route or pick a Delivery Order destination. Approve the customer as well.
Allowed transitions
| You are here | You click | It becomes |
|---|---|---|
| PENDING_APPROVAL | Activate Location | ACTIVE |
| PENDING_APPROVAL | … → Close Location | CLOSED |
| ACTIVE | Suspend Location | SUSPENDED |
| ACTIVE | … → Mark Inactive | INACTIVE |
| ACTIVE | … → Close Location | CLOSED |
| SUSPENDED | Reactivate Location | ACTIVE |
| SUSPENDED | … → Mark Inactive | INACTIVE |
| SUSPENDED | … → Close Location | CLOSED |
| INACTIVE | Activate Location | ACTIVE |
| INACTIVE | … → Close Location | CLOSED |
To change a location's status, open it from the customer's Locations tab (click View) and use the button at the top of its detail page, or the … dropdown beside it. Each action opens a confirmation page — Activate Location, Suspend Location, Mark Location Inactive or Close Location — where you can add an optional note before confirming.
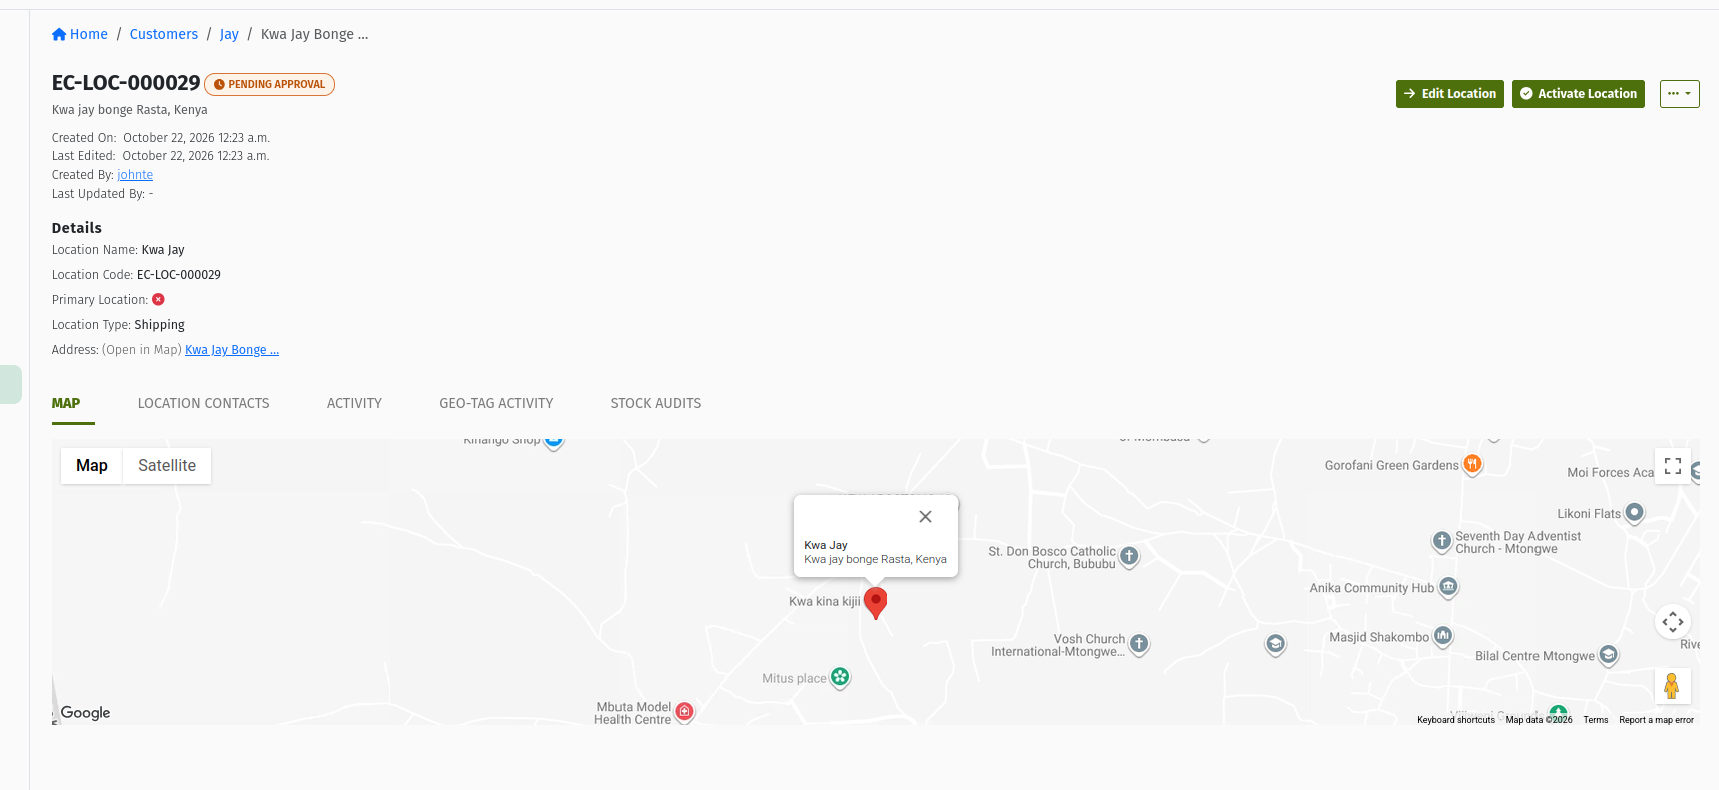 A Pending Approval location's detail page with the Edit Location and Activate Location buttons, the … dropdown showing Close Location, and the Map tab showing the pinned point.
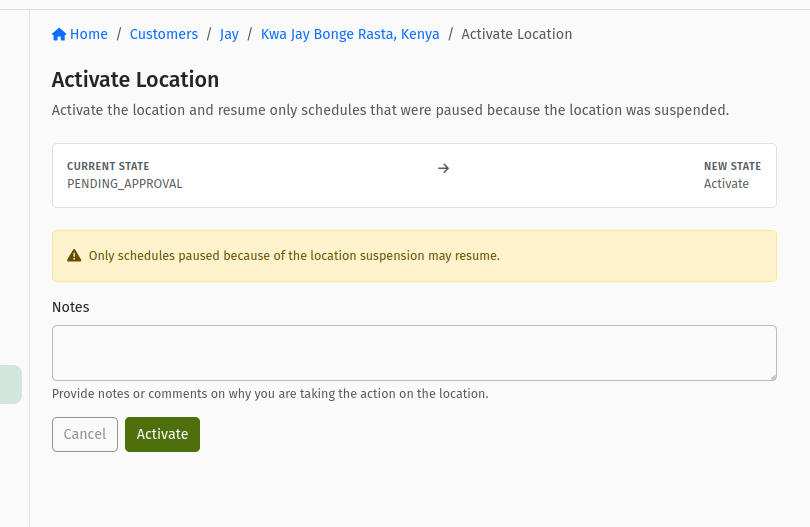 The "Activate Location" confirmation page with its optional notes box and the Activate button.
Suspending, marking inactive or closing a location stops it being offered for new routes and Delivery Orders, but it doesn't remove the location from routes it's already on. If a branch has closed for good, also remove it from its routes (see the Routes guide) so it stops cluttering trip planning.
Other location details
The location detail page also has tabs for Map, Additional Details (shown when those fields are filled in), Location Contacts, Activity (a history of changes) and Location Images (when a photo was uploaded). Use Edit Location to correct the address or details at any time.
9. Territory is assigned automatically
Your organisation divides its market into territories. You never pick a territory for a location — the system assigns it automatically, in the background, from the location's map point. It chooses the most specific territory that contains the point, and it re-checks this every time the location is saved, so correcting the address also corrects the territory.
If the point falls outside every territory your organisation has set up, the location simply won't be linked to one. If a location shows up in the wrong territory, the usual cause is a wrong map point: edit the location and pick the correct address.
10. How locations are used downstream
Once a customer is approved and its locations are active, those locations drive the rest of the delivery process:
Customer (Approved)
   ↓
Customer Location (Active)
   ↓ added to
Route  ──────────────→  chosen when creating a Trip
   ↓
Delivery Order (destination = the location)
   ↓ added to the Trip
Shipment (one per Delivery Order, delivering to that location)
- Routes — a Route lists the customer locations it serves. Only Active locations of Approved customers can be added.
- Delivery Orders — when you create a Delivery Order, you pick the recipient customer and then one of that customer's Active locations as the destination. A Delivery Order generated from a Sales Order copies the Sales Order's destination.
- Trips and shipments — when you add Delivery Orders to a Trip, the order list opens with its route filter set to the trip's route, so you first see orders whose locations are on it. Clear the filter to see the others, which carry an Outside Route tag and can still be added. When the trip is approved, a Shipment is created for each order, delivering to that order's location.
11. Worked example: a supermarket chain with three branches
Mavuno Supermarkets is a new corporate customer with a head office and three branches you'll deliver to.
- In Logistics → Customers, click + Corporate.
- Enter Full Name "Mavuno Supermarkets", the head office phone number and accounts email, choose the Customer Segment (e.g. Modern Trade) and the Business Partner Category (e.g. Supermarket). Click Save.
- On the Create location page, choose Location Type Billing, name it "Head Office", search and select the Upper Hill address, and click Create.
- Back on the customer, open Locations → + New three times to add "Mavuno Westlands", "Mavuno Thika Road" and "Mavuno Kitengela", each as Shipping, with the receiving hours in Description or other details. If you have approval rights, use Create and Activate.
- Upload any required KYC documents on the Documents tab, then click Approve.
- Check the Locations tab. Change the filter to Pending Approval if any branch was saved with Create, open it and click Activate Location.
- Now the three branches can be added to your routes — for example, Westlands and Thika Road on a "Nairobi North" route and Kitengela on a "Mombasa Road" route — and selected as destinations on Delivery Orders.
12. Permissions reference
| Permission | Controls |
|---|---|
VIEW_CUSTOMER | Seeing Customers in the Logistics and Sales menus and opening customer records. |
ADD_CUSTOMER | Creating Individual and Corporate customers. |
CHANGE_CUSTOMER | Editing customer details. |
APPROVE_CUSTOMER | Approve, Reject, Redraft, Suspend, Deactivate and Archive. |
ADD_BUSINESS_PARTNER_LOCATION | The + New button on a customer's Locations tab. |
APPROVE_BUSINESS_PARTNER_LOCATION | Activate Location / Reactivate Location, and the Create and Activate button. |
SUSPEND_BUSINESS_PARTNER_LOCATION | Suspend Location. |
DEACTIVATE_BUSINESS_PARTNER_LOCATION | Mark Inactive and Close Location. |
13. Common mistakes and troubleshooting
| Message / symptom | Cause | What to do |
|---|---|---|
| I created a customer but can't find it in the list | The list shows Approved customers by default. | Change the status filter to Draft. |
| I added a location but it's not on the Locations tab | The tab shows Active locations by default. | Change the filter to Pending Approval, then activate the location. |
| "The phone number … is already in use…" | Another business partner already has that phone number. | Search for the existing customer; don't create a duplicate. Use a different number only if it really is a different customer. |
| "The name '…' is already in use. Please choose a different name." | A corporate customer with that name already exists. | Find and use the existing record, or make the name more specific (e.g. add the town). |
| "Customer segment is required for customer partners." | No Customer Segment was chosen. | Pick a segment. If the list is empty, ask your administrator to set up segments. |
| "Sorry! Can not proceed with this action because some documents for … have not been uploaded…" | Required KYC documents are missing. | Upload the listed documents on the Documents tab and approve again. |
| "Invalid latitude. Kindly type and select your location from the dropdown." | An address was typed but no suggestion was selected. | Retype and click a suggestion from the dropdown. |
| A location can't be found when adding customers to a route or creating a Delivery Order | The location isn't Active, or the customer isn't Approved. | Activate the location and approve the customer. |
| The address search won't find a place outside Kenya | Address suggestions are limited to Kenya. | Choose the nearest Kenyan address and add detail in the descriptive fields. |
14. Best practices
- Search before you create. Duplicate customers split order history and confuse drivers. Check all statuses, not just Approved.
- One location per delivery point. Don't reuse a head-office location for branch deliveries — create a Shipping location for each place the truck actually stops.
- Name locations the way drivers talk. "Mavuno Thika Road – back gate" is more useful than "Location 2".
- Activate as you go. A customer with no Active locations can't receive deliveries. Make approving the customer and activating its locations part of the same set-up task.
- Suspend rather than close when in doubt. Suspension is reversible; closing a location is final.
- Keep instructions current. Update Description or other details when receiving hours or access change.
15. Quick reference
| Step | Action | Watch out for |
|---|---|---|
| 1 | Customers → + Individual / + Corporate | Unique phone and email; segment required |
| 2 | Save, then add the first location | Select an address from the suggestions (Kenya only) |
| 3 | Create or Create and Activate | Create leaves it Pending Approval |
| 4 | Upload documents, then Approve the customer | Required KYC documents block approval |
| 5 | Activate Location for each pending location | Change the Locations filter to see pending ones |
| 6 | Add the locations to routes | Only Active locations of Approved customers are offered |
Status meanings
Customer: DRAFT awaiting approval · APPROVED usable · REJECTED turned down · SUSPENDED on hold · DEACTIVATED permanently blocked · ARCHIVED final.
Location: PENDING_APPROVAL awaiting activation · ACTIVE usable · SUSPENDED temporarily out of use · INACTIVE not in use · CLOSED final.
Glossary
- Business Partner — the record for any organisation or person you trade with. A customer is a Business Partner flagged as a customer.
- Customer — a Business Partner you sell and deliver to; either Individual or Corporate.
- Customer Segment — the grouping your organisation uses for customers (for example by trade channel); required on every customer.
- Business Partner Category — the kind of business a corporate customer is.
- KYC documents — documents your organisation requires on file before a customer can be approved.
- Customer Location — a specific delivery (Shipping) or invoicing (Billing) point belonging to a customer.
- Location Type — Shipping or Billing.
- Territory — an area of your market; assigned to each location automatically from its map point.
- Route — a named delivery corridor listing the customer locations it serves. See the Routes guide.
- Delivery Order — the instruction to deliver goods to one customer location. See the Delivery Orders guide.
16. Frequently asked questions
Are Logistics → Customers and Sales → Customers different lists?
No. They show the same customer records. Create or edit a customer in either app and the change appears in both.
Can I activate a location before the customer is approved?
Yes — the two approvals are independent. But the location won't be offered for routes or Delivery Orders until the customer is Approved too, so approve both.
Can the same location be on more than one route?
Yes. A location can be added to as many routes as you need — for example, a branch served by both a weekday and a weekend route. See the Routes guide.
How do I choose a location's territory?
You don't. The system works it out automatically from the map point every time the location is saved. If the territory is wrong, fix the address.
A branch has shut for two weeks for renovation. What should I do?
Open the location and click Suspend Location. Any recurring delivery schedules for it are paused. When it reopens, click Reactivate Location and they resume.
Why can't I find the address in the search box?
Address suggestions come from Google and are limited to Kenya. Try a nearby landmark or the building name, select the closest match, and add directions in Landmark and Description or other details.
What's the difference between suspending and deactivating a customer?
Suspending is a temporary hold: recurring schedules are paused and the customer can be approved again later. Deactivating is permanent: schedules are cancelled and the only remaining step is to archive the customer.